Coordinating complex programmes often requires consolidating multiple project schedules into a single view. Microsoft Project’s Master and Sub plan structure enables programme managers to efficiently oversee delivery while allowing individual project managers to retain ownership of their plans. This guide outlines a practical and repeatable process for managing these plans effectively—especially in environments without Project Server.
Using a Master Plan
Being able to combine multiple project plans, often owned and maintained by different Project Managers, is a valuable skill. It enables you to view and report on progress across detailed plans. For example, you can generate lists of Key Milestones across a programme, track Delivery Events across a portfolio, or ensure that dependencies between plans are aligned.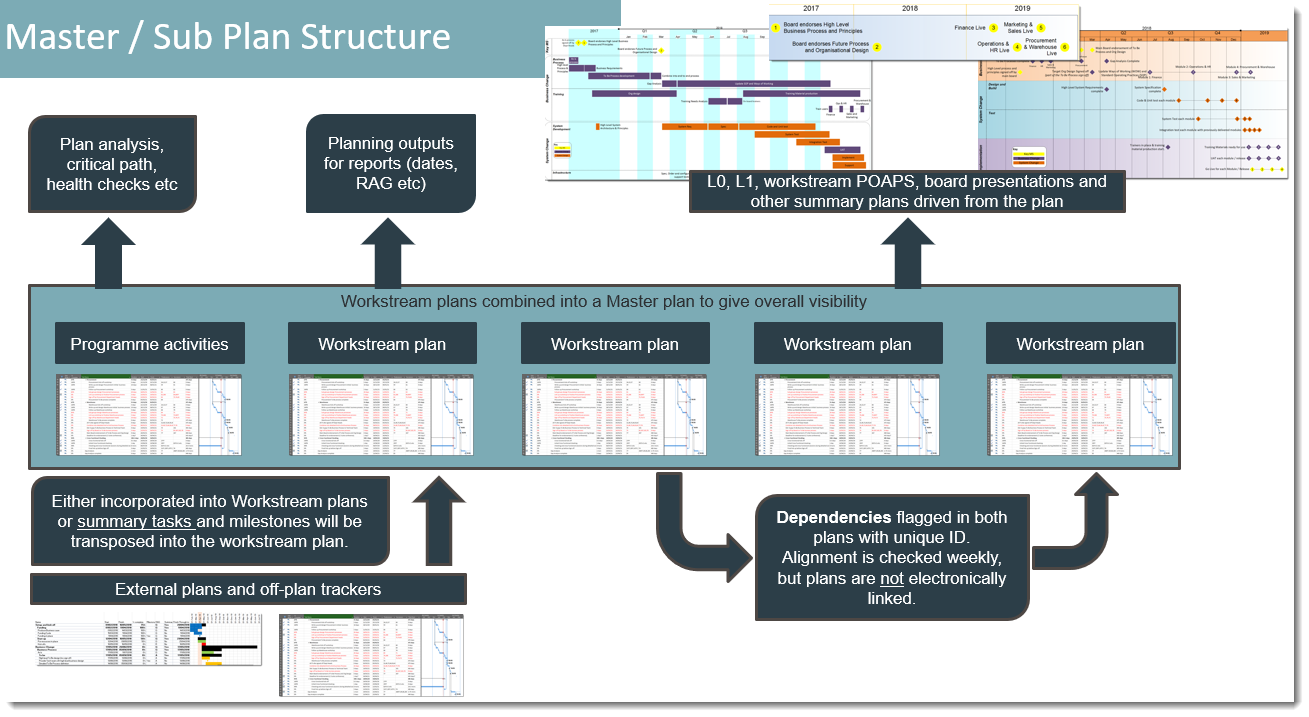
A Master MS Project file acts as an empty wrapper into which you insert Sub plans. When the Master is opened, Microsoft Project loads the Sub plans into memory. Although they don’t appear as separate plans in the View / Switch Windows menu, you are still editing the individual files. If you make changes in a Sub plan via the Master you are changing that plan, hence Microsoft Project will prompt you to save the Sub plan when closing the Master.
Setting Up a Master Plan
- Ensure all Sub plans use the same project template.
- Save all Sub plans in the same folder and remove version control details from their filenames.
- Open one Sub plan and use Save As to create the Master file. This ensures consistency with the project template.
- Delete all task and resource data from the Master plan by selecting all rows (click the top-left cell of the table area) and pressing Delete.
- You now have a blank Master plan into which you can insert Sub plans using Project > Insert > Subproject. Use shortcut `<ALT><I><P>` if preferred.
- When inserting, ensure the Link to Project checkbox is selected to create a dynamic connection.
Each inserted Sub plan will appear with the title defined in `File / Info / Project Information / Advanced Properties / Title`.
Managing Dependencies
Avoid creating electronic links between plans. These links can cause issues when files are saved to the Output folder, archived, or break when returned from PMs, creating unnecessary complications.
Instead, coordinate dependencies using clearly labelled, matching, milestones in both plans. Use two custom fields:
- Dependency Direction – e.g., In / Out, Dep In / Dep Out, or Dependency / Deliverable
- Dependency Reference – A unique identifier such as `DEP_001` or `Dep_WorkstreamName_001`
This approach helps ensure PMs maintain matching dates and makes identifying communication breakdowns across plans easier. If inconsistencies arise, they can be addressed proactively.
Note: This method means critical path analysis is less visible. You can temporarily connect dependencies to run a critical path report and then remove the electronic links. Use a custom view with the filter Dependency Direction ≠ blank, sorted by reference and direction. If many links exist, a macro can simplify connecting and breaking them.
Folder Structure
A consistent folder structure is key to managing and maintaining the Master plan:
- Inputs – Store updated plans received from PMs. This folder is archived weekly as a record. Files include version control in the filename (e.g., `Project A 20250321a.mpp`).
- Programme Plan – Contains the active Sub and Master plans with no version control in filenames (e.g., `Project A.mpp`). File names must remain unchanged.
- Outputs – Contains final versions after updates and analysis, saved with version control (e.g., `Project A 20230524a.mpp`). This folder is also archived weekly.
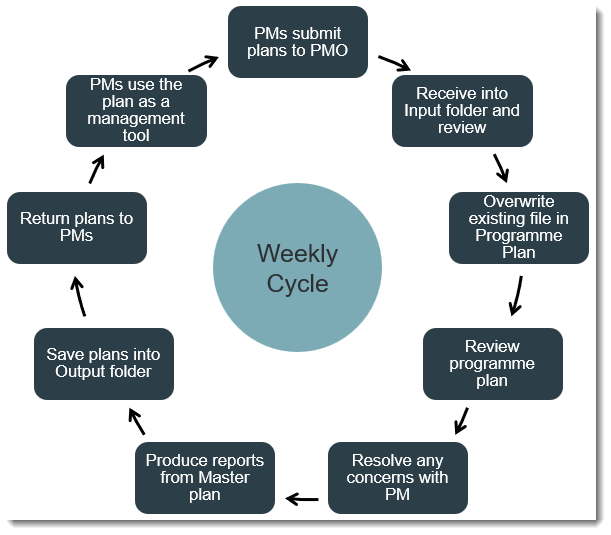
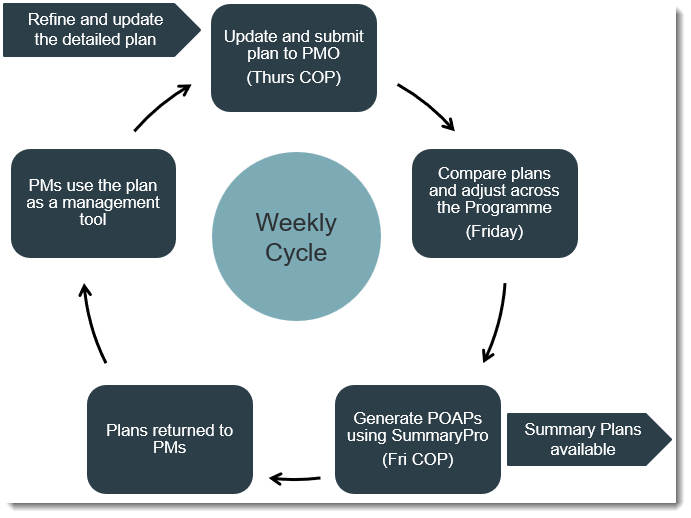
Weekly Update Process
Each week, follow this process for each file:
- Archive the previous week's Input and Output folders.
- Receive updated project plan files from PMs.
- Perform initial checks to ensure the files are valid and suitable for update.
- Save each file into the Input folder.
- Overwrite the corresponding file in the Programme Plan folder using **Save As** (do not change the filename).
- Close the updated file.
Once all plans are updated:
- Analyse the Master plan to confirm alignment—especially dependencies, resource conflicts, and significant schedule movements.
- Review concerns with the relevant PMs and adjust plans as necessary. Edits can be made either in the Master or directly within Sub plans.
- Run required reporting: Plan on a Page, Key Milestones, schedule variances, etc.
- Save and close all files.
Then, for each plan:
- Copy it to the Output folder.
- Rename the file to include version control.
- Return the updated plan to the PM.
Conclusion
Using a Master/Sub plan structure allows for rapid reporting across large programmes while preserving PM ownership of individual plans. It reduces downtime for PMs and maintains a high level of coordination without requiring Project Server.
If you're using Project Server or Project Online, much of this is automated. But when working in a file-based environment, this “Organic Project Server” approach is both efficient and reliable.